The time that we have been here, I haven’t really touched my bathroom or the bedroom. It’s been the same builder antique white that is everywhere for a long time. My Sis worked on her bathroom and bedroom awhile back and both look awesome now. Especially her bathroom, Good job Sis!
So I finally decided I need to do something too. I painted my bathroom several months ago but was still deciding on what else to do. Painting it helped a lot but I wanted my bathroom to have some character. I scoured the internet for ideas and fell in love with a wall technique called “Board and Batten”. I searched and searched for this B&B to get some how to’s and some inspiration on how I want to do mine. I started getting obsessed with DIY blogs and discovered some really great blogs. One of my favorite is Pretty Handy Girl. What’s great about PHG is she is a local and her blog is very informative. Her B&B tutorial really helped me to start on mine and it helped out a lot! I learned a lot of great techniques from her. From caulking to painting, PHG gave me the encouragement to just go for it.
I wish I had the really before pic with the builder white and really nothing going on in this bathroom. But I just recently started blogging and before then I painted my bathroom the color that I wanted. So we are going to start here.
Firstly, I determined how high I wanted the board and batten to go up the wall. I wanted it pretty tall. I think there is a formula for this but I just eyeball how tall I wanted it to go. Used my really long level to make a straight level line on the wall and made sure each wall that will have the B&B was level to that line. Then I started the priming. I used Bulls Eye 123 to prime the walls. I think it took about 3 coats to prime. The blue/grey color on the wall was I guess pretty dark and needed that many coats. Once the walls were primed, then I started on taking measurements and cutting the wood for the B&B. Now this is the first time I’ve ever used a miter saw and my nail gun and compressor. I read all the instructions like several times and was really nervous and afraid I was going to cut my fingers off and shoot myself in the leg or hand with the nail gun. LOL!!! But I started to gain some confidence and got comfortable with both tools and started to really gain some speed when putting up the boards.


It felt like it took forever to put up the boards, caulk all the seams and the dents and nail holes, sanding and to paint and prime them. There was ALOT of painting going on. Eventually, I got to the point of the final coat of paint. I choose Valspar White on White. It’s like a nice soft but bright white. I think the blue/grey color of the walls really pop now.
After everything was painted and done. I put up my towel bars and the glass shelf I got awhile back on clearance at Target. I also painted my bathroom builder grade cabinet. It makes the bathroom look so much better. I want to eventually get some hardware on it, but want to find something special and vintage. Also, I have a bathroom shelf and basket thing I got when I moved in to hold more stuff. I really want like a white wood cabinet but those things are expensive. So Twin Ninja suggested we cover it with fabric and put sticky Velcro so it will hold up the fabric and I can get to my stuff easily. We found a clearance shower curtain at Walmart that was perfect for it. It also added some more color to the bathroom as well. Ninjagrl got on it and made it for me. It turned out great! Thanks Big Sis! :)


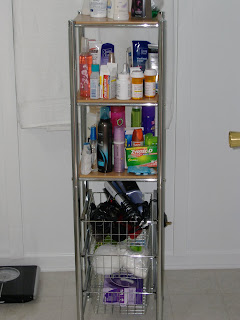
I wish I had a better camera so that you will really see the colors in this room but maybe for Christmas we will get one. :) Also excuse the pic with my toiletries and stuff. :P
Overall, it was a good experience and I learned a whole lot from it. I will definitely put up the B&B again. I want to do my bedroom almost the same way. I really love the comfy country look and that's the direction I'm going for my bedroom. I got alot of tips and help from friends and of course PHG and other sites. My bathroom is not quiet finish as I want to redo the floor and put up some accessories. I will definitely post pics of the final reveal. :D
I hope you enjoy and if any questions just let me know. How does it look? Like or dislike? lol..
P.S.. I dunno what is up with the font on this post.. hahah..


Ninjagrl looks too happy with that nailgun. lol..
ReplyDeleteI was!! I can't wait to nail some more stuff!! Your bathroom looks amazing sis!! Glad I can contribute to it!!!
ReplyDeleteI really like the B&B effect. It really gives some nice texture to your bathroom!
ReplyDelete